

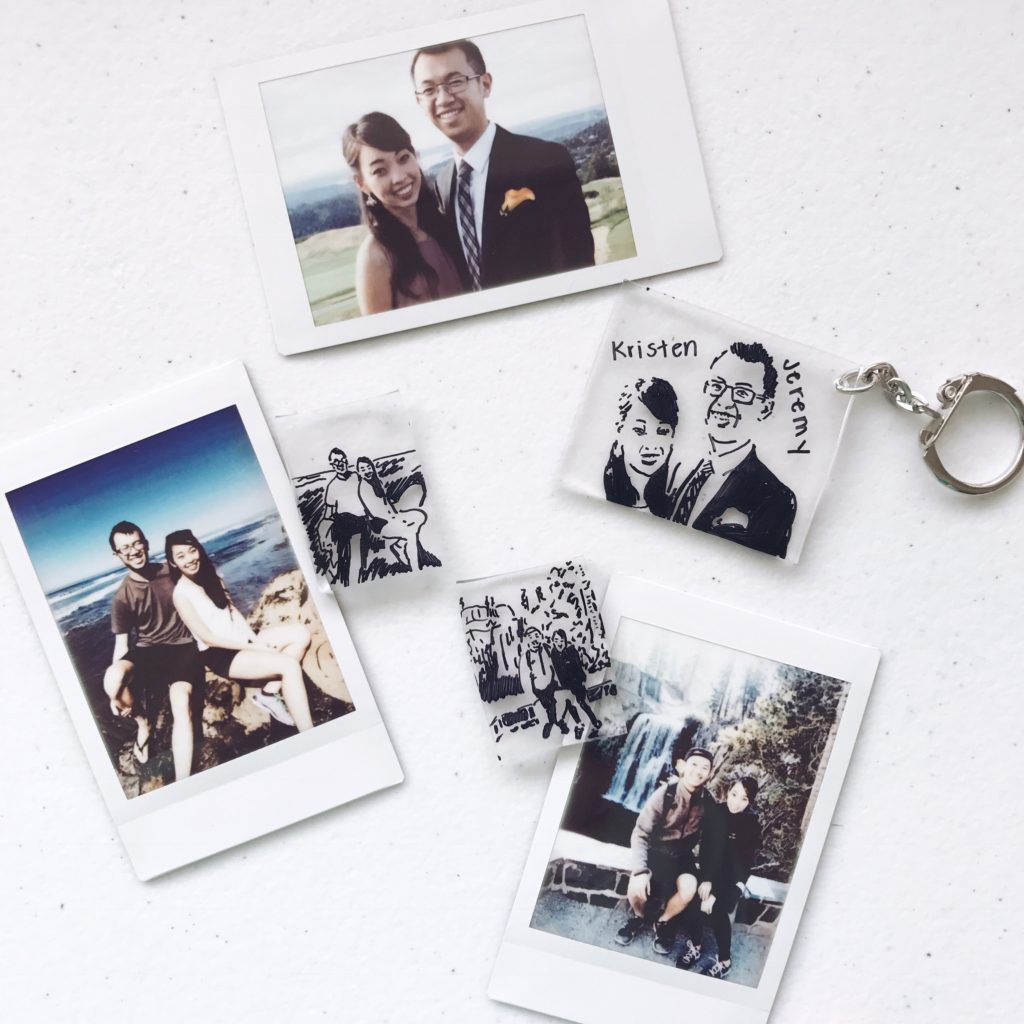
I don’t know why I find shrinky dinks so fascinating. Is it the name, shrinky dink? Or is it watching the plastic spontaneously curl up and flatten in the toaster oven? Either way, shrinky dinks are one of my favorite DIYs. But let’s be real – a child can do a shrinky dink, just as I once did, sitting at the craft table during church camp, and that doesn’t really deserve its own blog post. I also don’t really want to create piles of colorful plastic, because drawers cluttered with impractical toys do not spark joy. So how could I translate the sheer fun of shrinky dinks into an acceptable adult DIY? I present to you the custom photograph shrinky dink keychain!
Now, if I was an amazing artist, I could just freehand a masterpiece to shrink down. But I am not. I need something to trace, so I had to look up some photo editing magic for this to work. I would call this DIY a beginner-intermediate level craft. But stick with me here, and you too can have the shrinky dink keychain of your dreams. The process is pretty much broken down into two main components: preparing your photograph and creating the actual shrinky dink. Let’s go!
Materials:
- A photograph
- Some sort of photo editor – either photoshop, GIMP, something browser-based like PicMonkey, or even your phone
- Permanent marker(s)
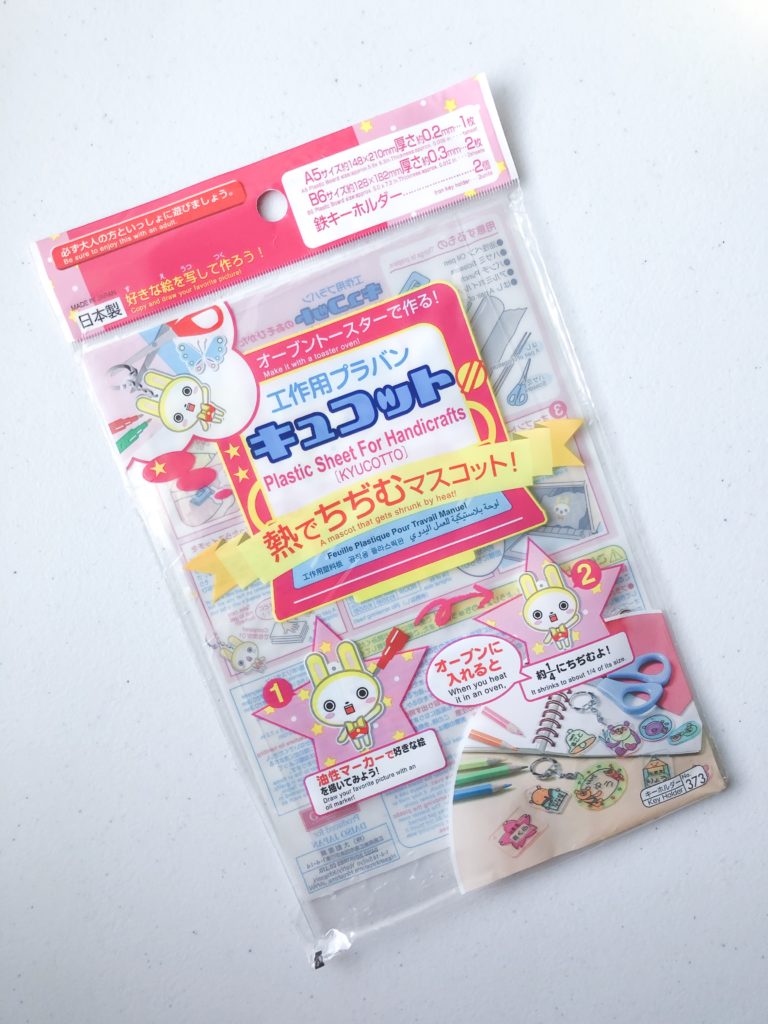
- Plastic that will shrink in the oven*
- Hole punch
- Key chain
*A note about the plastic: You can buy plastic for shrinky dinks specifically. I actually bought a shrinky dink set from Daiso that included plastic and keychains. However, I read online somewhere a long time ago that you can recycle any #6 plastic for shrinky dinks. Check your plastic containers for the recycle symbol, and see if it has a number six in the middle. You can cut out a piece of that plastic, and it should work just the same. BUT I have to say that I haven’t tried it in years, and I don’t know if it still works, so proceed with caution.
Step 1: Preparing your photograph
Choose a photo that you want to put onto a shrinky dink keychain. The best photos will not have too busy a background. Also remember that it will shrink down, so you may want something where the subject is close up. What you want to do is turn it into a black and white drawing that you can trace onto your plastic. There are a couple ways you can do this. One is a little bit fancier and uses a photo editing software on the computer. Option two uses just the built-in iphone photo editor.
Option 1: Photoshop or other photo editing software
- Open your photo on photoshop or gimp.
- Desaturate the photo (aka make it black and white).
- Adjust the threshold until you have only two different tones in your photo; black and white (no grey areas). You may have to play around with the settings a little bit because you still want the photo recognizable.
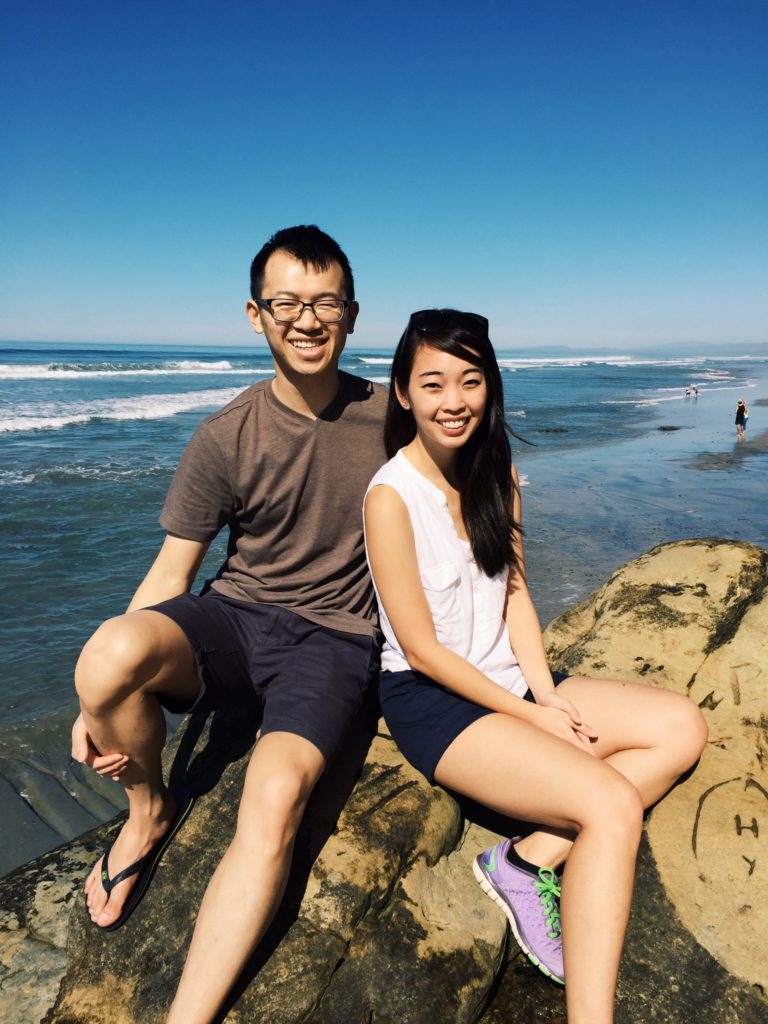
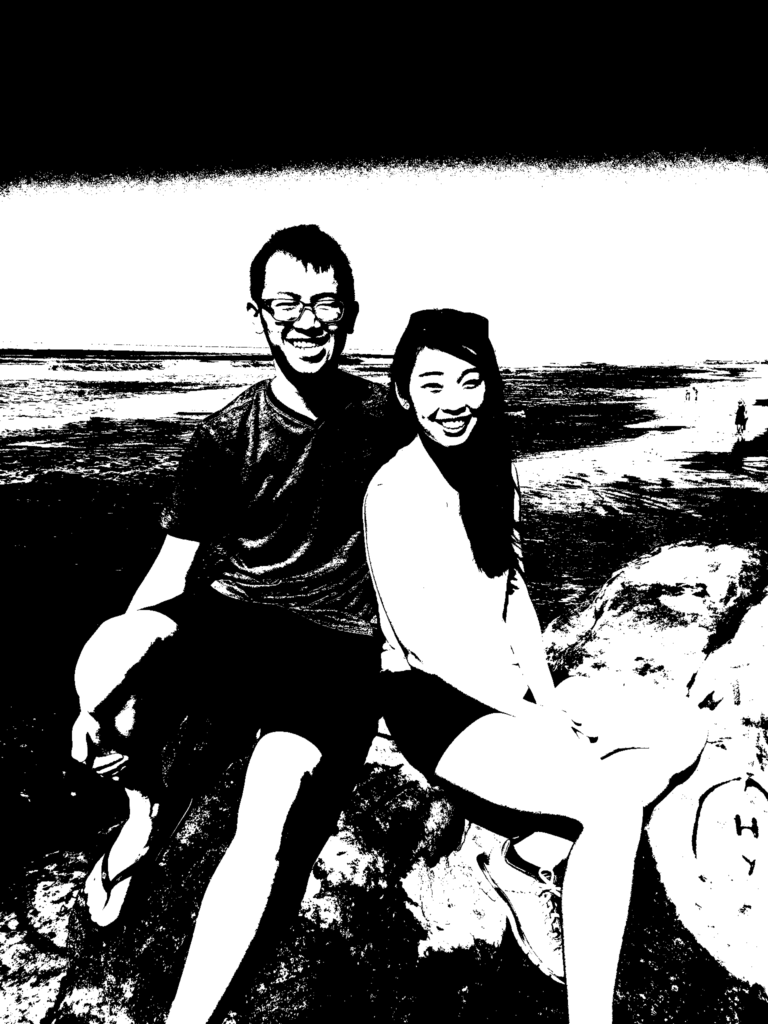
On the left you have my original photo, and on the right is after doing the edits. If you don’t have any fancy photo editing software, you can use the iphone to get something good enough. This is usually what I do when I’m lazy.
Option 2: Iphone
- Use a filter to change your photo to black and white.
- Increase the contrast all the way and adjust the black point and exposure until you have essentially only one dark tone and one light tone in your photo. You may not be able to get it exactly down to two but you can get it close enough.
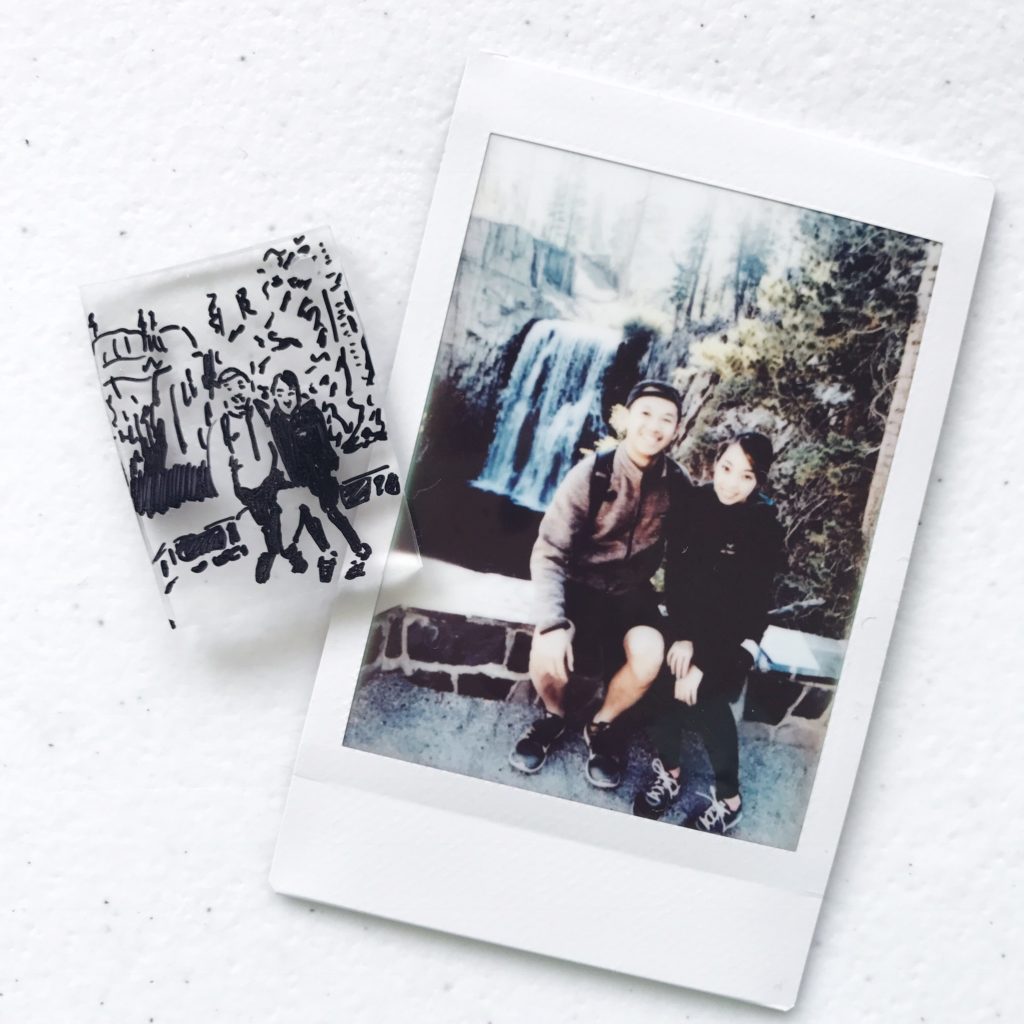
Your end photograph should look similar to this:


Okay, now that you’ve got a mostly two tone photo, let’s move on to step 2.
Step 2: Making the shrinky dink
Your plastic will shrink down to about 1/4 of its size. To get a 1×1.5 inch keychain, I used a 4×6 inch piece of plastic. That’s the closeup couple pic of me and hubby that you see. The other picture of us at Torrey Pines in La Jolla was done on a 2×3″ plastic, so you can see it shrunk down even smaller. Now you can either resize your photo (if needed) and print it out so it’s 4×6 inches, or you can resize it on your laptop/ipad screen until it is roughly that size. Place the plastic on top of the photo and trace the dark parts with a sharpie. Punch a hole where you want to attach a keychain. You’re ready to shrink!

Line a tray with aluminum foil. The instructions on my Daiso kit actually say to crumple up the aluminum foil, I think to prevent the plastic from sticking to it, but I’ve had success with it just being loosely lined onto a tray. Place your plastic on the foil and stick in a toaster oven at 275 degrees F for 1-4 minutes*. Now here you need to watch closely. Every toaster oven is a little different, so I don’t have an exact time for you. What you’ll want to look out for is your plastic shriveling up. If you wait just about a minute more, the plastic will eventually flatten back out again. This is when you want to take it out of the oven.
*Note: The Daiso set instructions say to use this temperature for shrinking, but I believe the actual shrinky dink sets you can buy at craft stores say to use 325 degrees F. If your plastic doesn’t shrink very well, you may need to increase the temperature to 325 degrees, but be very careful as you can melt the plastic if the temperature is too high.
While your plastic is still warm, you may need to press it completely flat with a book or a ruler. Let it cool and attach your keychain. VOILA! It’s done!
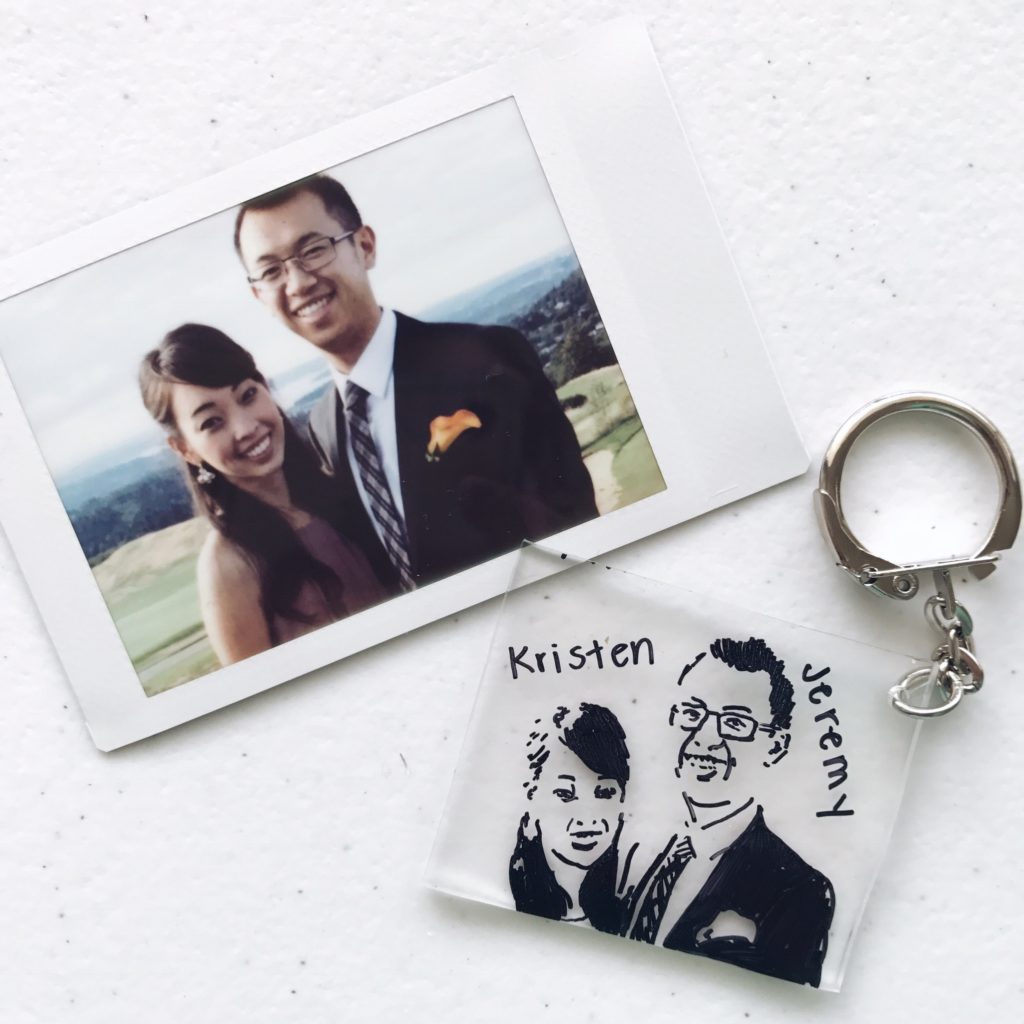
Hope you enjoyed this craft! If you want information on these Fujifilm photos and how I used them in another craft, see my DIY thank you card post. Be sure to stay tuned for more DIYs.

2 comments
did you punch your hole Before or after you baked your shrinky dink?
thanks for saying !
Hi Lizzy,
Definitely punch the hole before baking! You won’t be able to cut through the plastic after.