

This easy lemon naked cake has a soft, fluffy texture just like a Chinese bakery cake. It packs a huge punch of lemon flavor without using lemon zest (you’re welcome). Like some of my other signature cake recipes, this lemon cake uses oil, not butter, so it is super easy to make and stays moist for days. Keep reading for instructions on how to adapt this recipe for different lemon flavor pairings (lemon elderflower? lemon olive oil?) and how to make the rustic semi-naked cake frosting style.

In my family, everyone loves lemon and nobody likes extreme sweets. We threw a small family birthday party for my daughter Juliet recently, so I turned to a tried and true favorite: a lemon layer naked cake!
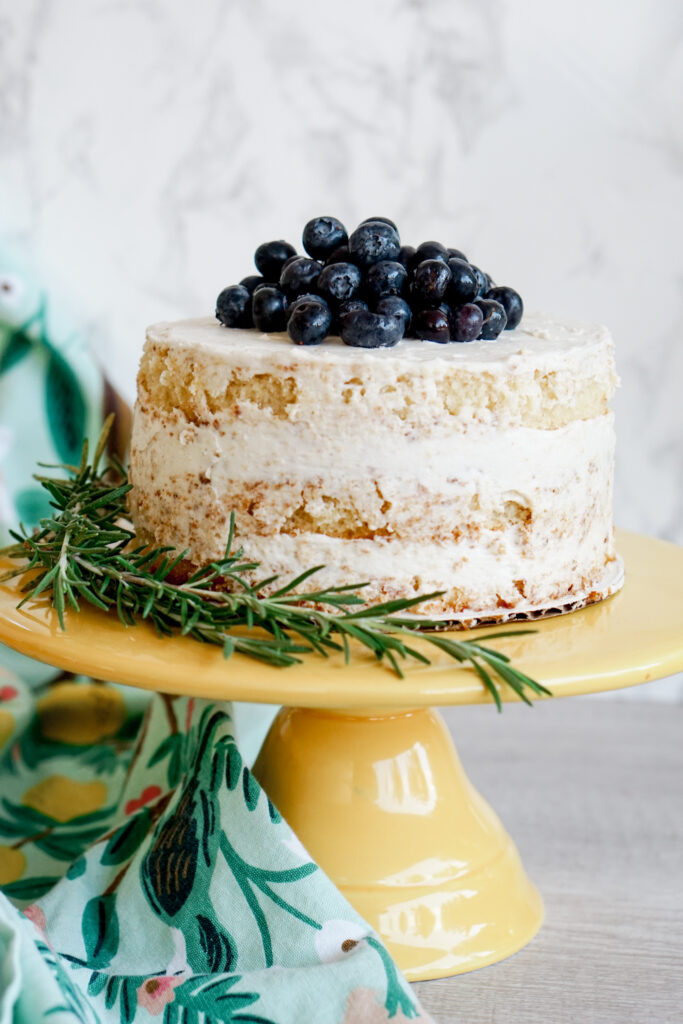
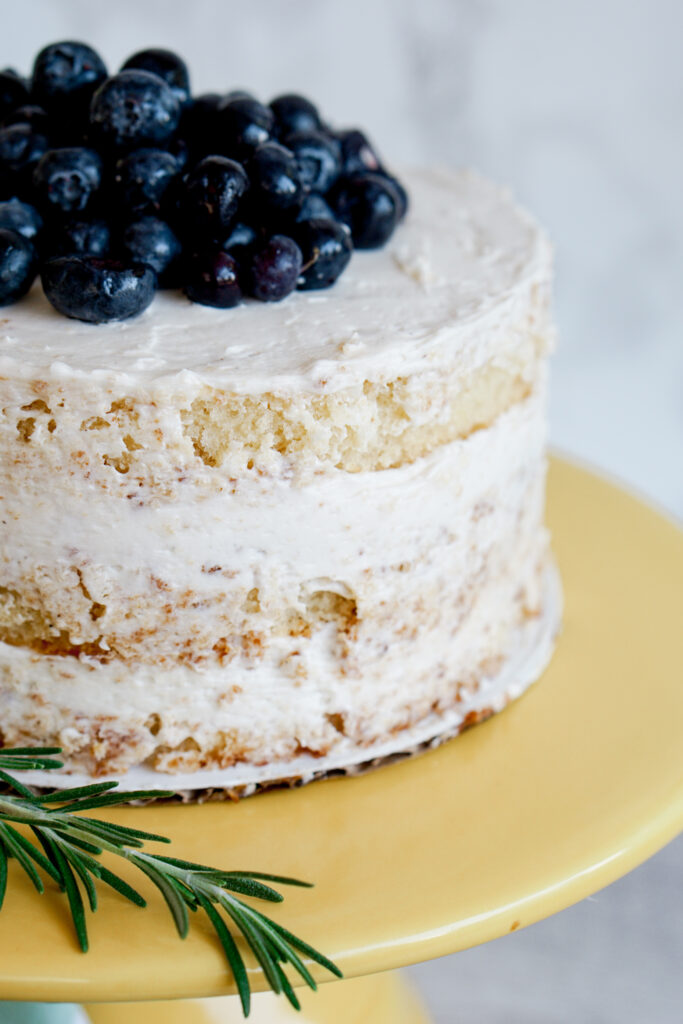
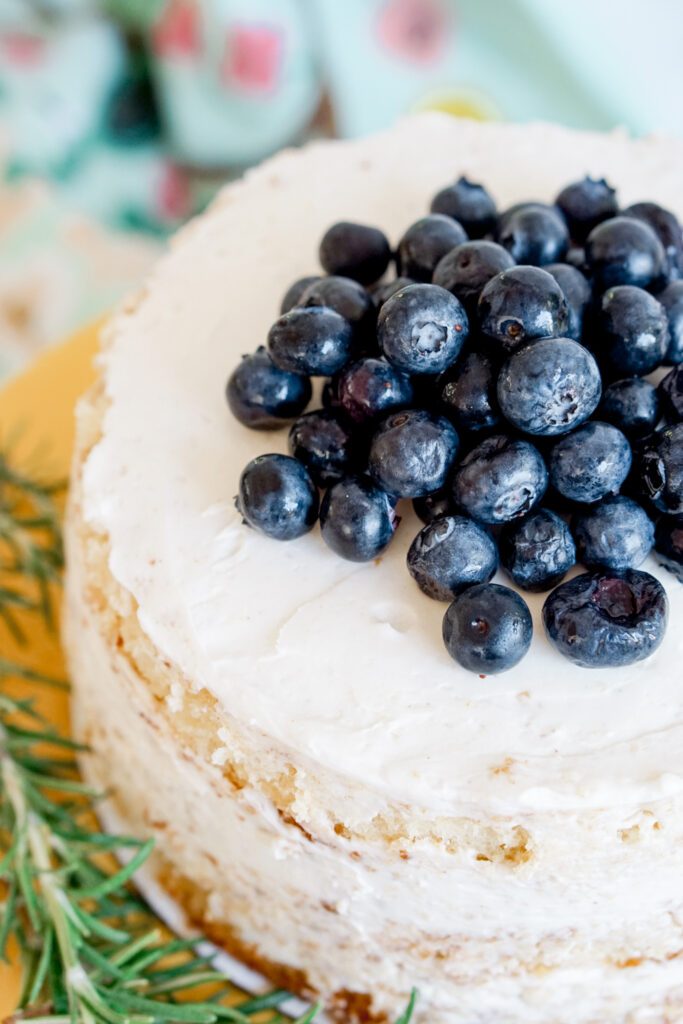
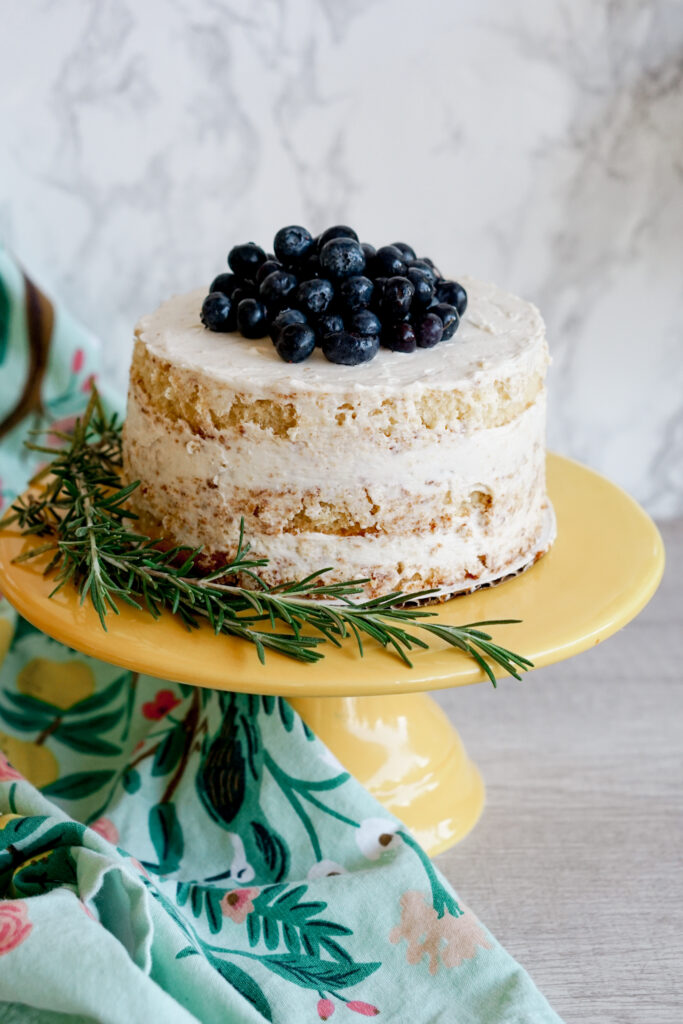
Now, Juliet’s favorite food is blueberries, hands down. Initially I was thinking of making a lemon blueberry cake, but… well… have you ever had two young kids? Time is of the gosh-darned ESSENCE. I decided to make the cake just lemon flavored because it is SO easy and SO quick. Seriously. Plus, I could always decorate with fresh blueberries on top.
And to make everything even EASIER, I went with a rustic, naked cake style of frosting. But I’ll get to the how-to on that later. First, some notes on what makes this cake so special:
- It is soft and fluffy like a Chinese bakery cake
- It is oil based
- No zest required
- You can easily modify the flavor pairings
Let’s get more into the details, shall we?
What is a Chinese bakery cake?
If you go into a modern Chinese bakery, at least in America, you will notice that all the cakes have a similar texture. They are very light, soft, and spongy. Additionally, they are only lightly sweetened. Often the frosting is some derivative of whipped cream. These are NOT the typical dense, heavy, sweet buttery cakes of most American bakeries.
Now, typically, these kinds of soft Chinese bakery cakes are known as chiffon cakes in western baking. Chiffon cakes are made by separating the egg whites and yolks, beating them separately with other cake ingredients, and then incorporating them all together at the end by folding very gently. I’ve got a great Chinese chiffon cake recipe here on the blog, where you can read more about the difference between modern Chinese bakery cakes and traditional ones, which are steamed.
But I gotta be honest with you, as much as I LOVE chiffon cakes, I am just too lazy to make them regularly. I hate having to separate eggs. So in developing this lemon cake recipe, I used a different method: the oil-based genoise.
Oil-based cakes vs. butter cakes
Most cakes that you find in popular American bakeries are butter cakes. They start with softened butter that you cream with sugar. The resulting sponge is soft and flavorful, but somewhat dense, very sweet, and can dry out easily.

Oil-based cakes are great because they keep the cake extra moist. AND, as a bonus, you don’t have to wait for butter to soften to make the batter. Plus, you won’t have to worry about creaming the butter and sugar properly. I truly believe many a beginner baker has been thwarted by the very first step of creaming softened butter.
Chiffon cakes, as referenced earlier, also use oil as a source of fat. But, as I also mentioned earlier, I am much too lazy to separate eggs and beat them separately when I want a quick and easy cake recipe. Who wants an extra bowl to clean? Not this mom, that’s for sure.
So What is a Genoise Cake?
A genoise cake is made by beating eggs whole with sugar. The air incorporated with this beating provides all the rise for this cake – no baking powder. Melted butter can be added for fat and flavor. Add the flour and that’s it.
Well, to make this lemon cake FOOLPROOF, I added some insurances. First, I use oil instead of butter, so I know this cake will be extra moist. Plus, it eliminates the extra step of having to melt butter, because I am that lazy. Second, I add a rising agent so I do not need to rely on my egg-beating skills. For a standard cake, I would use baking powder. BUT, since lemon is very acidic, I used baking soda in this recipe instead. Baking soda is alkaline, which neutralizes some of the acid from the lemon juice.
And there you have it. An easy peasy lemon cake that has a light and spongy texture. I guess you could say this type of cake is a perfect mashup of the chiffon sponge and genoise. You can get that soft sponge cake texture but with half the work!
How to Adapt this Lemon Cake Recipe for Different Flavors
Alright, so now that you know HOW to make this cake, let’s talk about how to make different flavor variations. The easiest thing you can do is to substitute different types of extracts. My original recipe uses half a teaspoon of orange blossom water (which you can find at Whole Foods) and half a teaspoon of almond extract. I really enjoy the floral notes of these flavors. However, of course you could substitute vanilla extract instead. Or, if you’ve recently taken a trip to Ikea, try elderflower extract, to mimic the cake from the royal wedding.
Looking for something less flowery? Try substituting the neutral oil in this recipe for olive oil!
How about playing with the citrus? If you like your lemon cake TART, keep the 1/2 cup of juice that the recipe calls for. This took me about 4 lemons. If you prefer a sweeter, milder lemon flavor, reduce the amount to 1/4 cup lemon juice and substitute 1/4 cup water. Or, use another citrus juice. If you do 1/4 cup yuzu juice, and you’ve got my yuzu lemon cake recipe! How easy is that?
Basic Tools Needed to Frost Your Cake
Once you’ve got your cakes all baked, it’s time to decorate. This recipe is perfect for a three layer, six inch cake. If you’re going for a three-layer, eight inch cake, I suggest TRIPLING the cake recipe to make sure you get tall enough layers. Don’t forget to make extra frosting as well.
But anyway, let’s say you’re going to do a six inch naked cake, like mine. The basic tools I recommend are a turntable for cake decorating, a small offset spatula, and a cake board. You can get all of these tools at your local craft store for a fairly decent price. If you don’t use these tools, (ie you use a butter knife and a plate), I cannot guarantee your success, so be forewarned. If you are interested in even the most basic cake decorating, I highly recommend investing in some basic products.
How to Frost a Rustic Naked Cake
The first step is to place the cake board on top of your turntable. If it feels like it slips off too easily, you can put the board on top of a damp towel. Place a smear of buttercream on top of your board. Now you’re ready for your first cake layer.
This particular recipe bakes cakes that are fairly flat, which is great for beginners. This means that you will probably not have to torte your cake layers. Torting refers to cutting off the tops of your cakes so that they are flat and will stack evenly. So take your cakes out of the tins, check them to see if they are all level, and make adjustments as needed.
Place a cake layer on the cake board. Plop some buttercream (about 1/3-1/2 cup) on top and smooth out with your spatula. Place another cake layer and repeat. Place the third cake layer and repeat again. You’re already halfway done decorating! How easy was that?
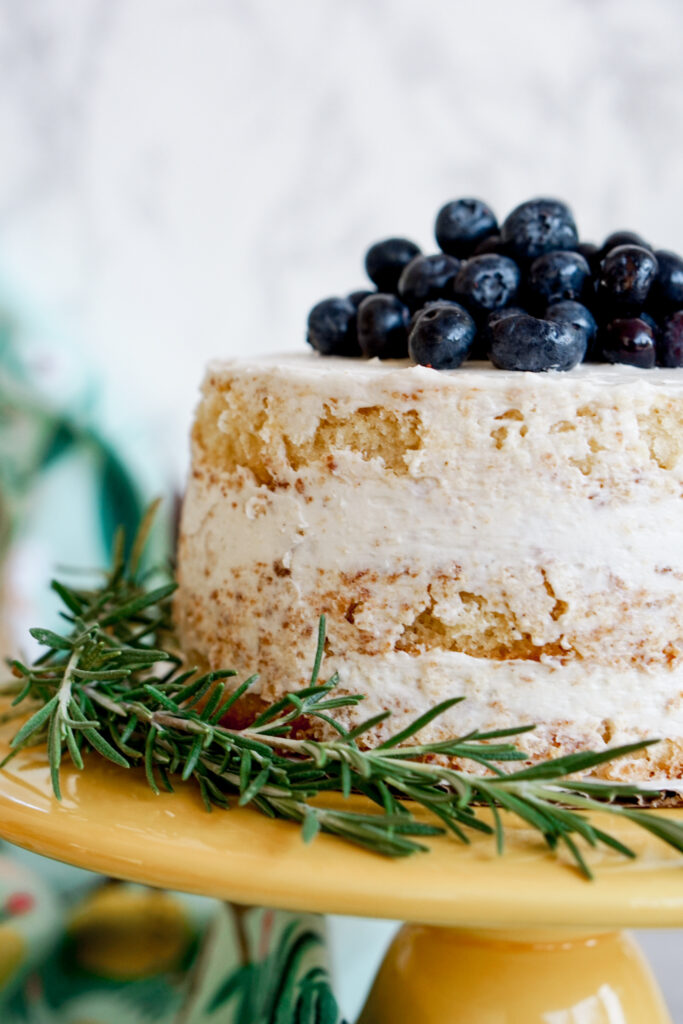
Okay, now you should three cake layers with frosting in the middle and on top. You probably have frosting sticking out at funky places. That’s okay. Take your spatula and roughly smooth it out along the sides of the cake, concentrating at the gaps in between the layers.
Now, place your spatula vertically up against the side of the cake. Hold the spatula still while you turn the turntable with your other hand. This should smooth out the sides of your cake. Okay, this is where some artistic intuition comes in. Take a step back and look at your cake. Are there places that just seem too empty? Too rough? Too patchy? Plop some extra frosting there and smooth out the cake again. Keep going until you’re satisfied. At the end, you’ll have a perfectly rustic, semi-naked cake!
I hope you enjoyed this lengthy explanation for lemon cakes that nobody asked for! If you have any questions about cake decorating, please let me know in the comments or find me on Instagram!


Easy Lemon “Naked” Cake with Vanilla Buttercream
Ingredients
For the Lemon Sponge Cake
- 1 cup sugar
- 2 eggs
- 1/2 cup flavorless oil, such as corn or canola
- 1/2 cup lemon juice
- 1/2 tsp almond extract or other extract
- 1/2 tsp orange blossom water or other extract
- 1 cup flour
- 1/2 tsp kosher salt
- 1/4 tsp baking soda
For Vanilla Buttercream
- 1 cup butter two sticks, softened
- 2 cups powdered sugar
- 1 tsp vanilla extract or other extract
- 2 tbsp heavy cream or whole milk
Instructions
To Bake the Lemon Sponge Cake
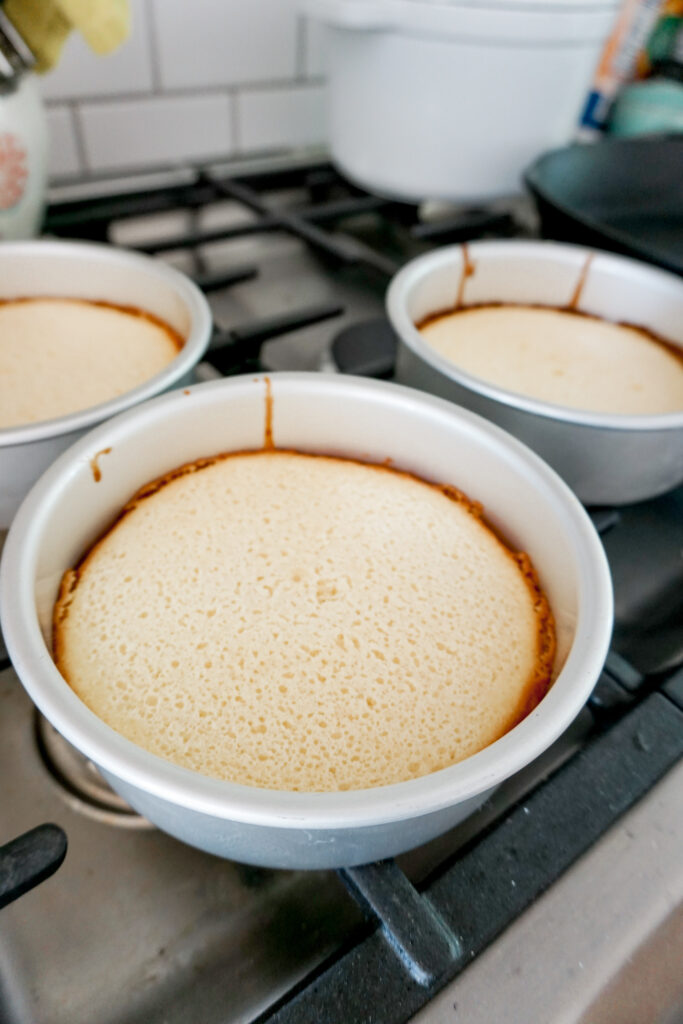
- Preheat oven to 350 degrees F. Grease and line three 6" round cake tins (or one 8" round cake pan or 12 cupcakes)
- Beat eggs and sugar until batter is pale, fluffy, and holds its shape in ribbons just slightly when dripping off the beater.
- Beat in oil until completely homogenous.
- In a separate bowl, mix citrus juice and extract together.
- In another bowl, mix dry ingredients together until well combined (flour, baking soda, salt).
- Alternate adding citrus liquid and dry ingredients into your batter, mixing or folding very gently to preserve the air bubbles.
- Pour evenly into the cake pans. Batter will be fairly thin.
- Bake in preheated oven for 18-20 minutes, or until a toothpick inserted in the center comes out clean and the cake is springy to the touch. Allow to cool completely before frosting.
For the Vanilla Buttercream and Semi-Naked Frosting Style
- Beat the softened butter using a mixer; if using a stand mixer, use the paddle attachment.
- Stop mixing to add in the powdered sugar (lest you have a sugar explosion).
- Beat again until ingredients are fully incorporated. Then add in extract and milk or cream.
- Scrape down the sides of the bowl and resume beating until the buttercream has doubled in volume.
- To frost the lemon cake in a semi-naked style, I recommend using a 6" cake board, a turntable, and an offset spatula. Place the cake board on top of the turntable.
- Add a smear of buttercream on the cakeboard and place one layer of cake on top. Add about 1/3-1/2 cup frosting on top of that layer. Smooth out with the offset spatula, turning the cake as needed to get a flat surface.
- Repeat with the other two layers of cake.
- You should now have three layers of cake with a 1/4-1/2 inch layer of frosting on top of each one. Using the offset spatula, smooth any excess frosting sticking out from in between your layers along the sides of the cake.
- Holding your spatula flat against the side of the cake with one hand, slowly spin the turntable with the other hand in order to get a smooth surface.
- If there are any spots of cake along the sides that look too rough, simply add smears of frosting and repeat the previous step until the sides are smooth. Alternatively, you could also use a bench scraper instead of an offset spatula to smooth the sides.
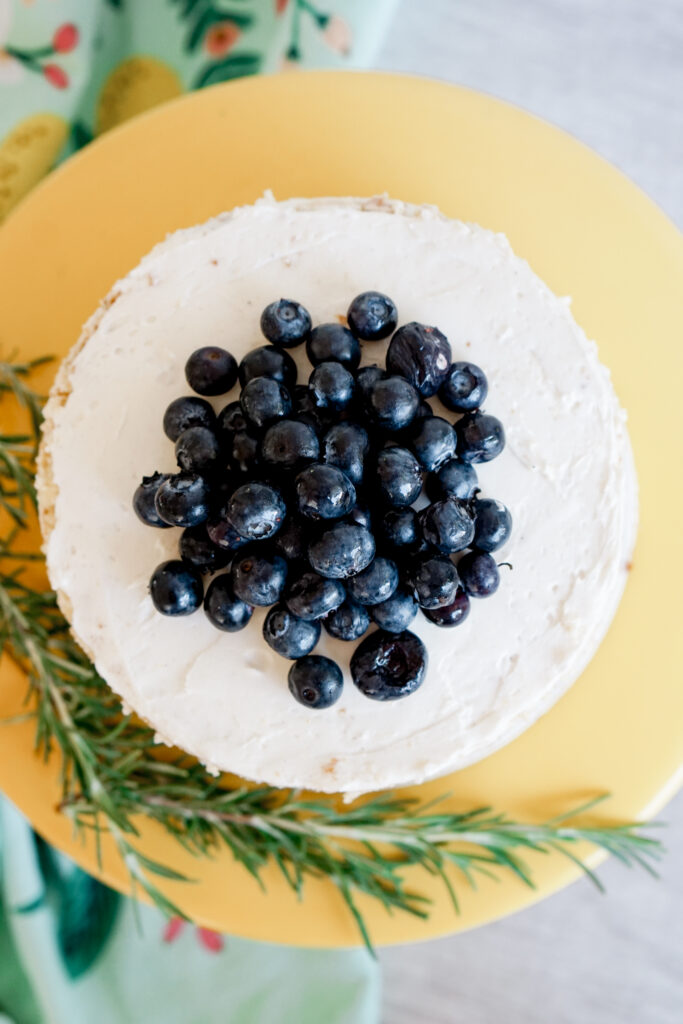
- Finish decorations to your liking! I used a pile of blueberries on top and a few sprigs of rosemary on the bottom.
- This cake stays good covered at room temperature. If you have a lot of exposed cake that is not covered in frosting, I recommend putting your cake in the fridge to let the frosting crust. Then press plastic wrap directly on top of your cake to prevent it from drying out.