

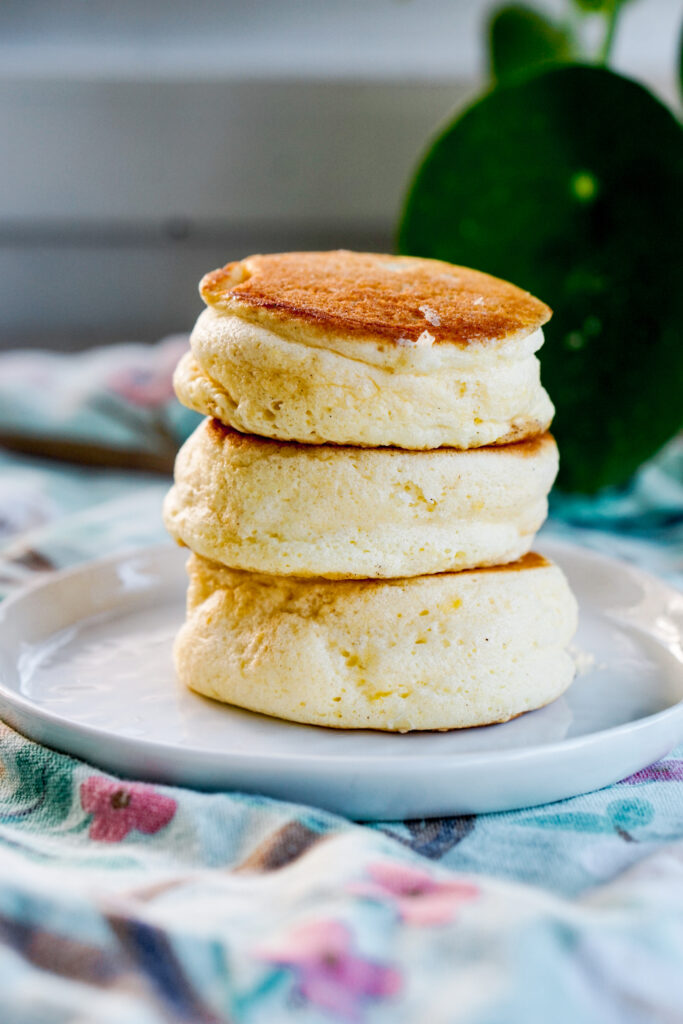
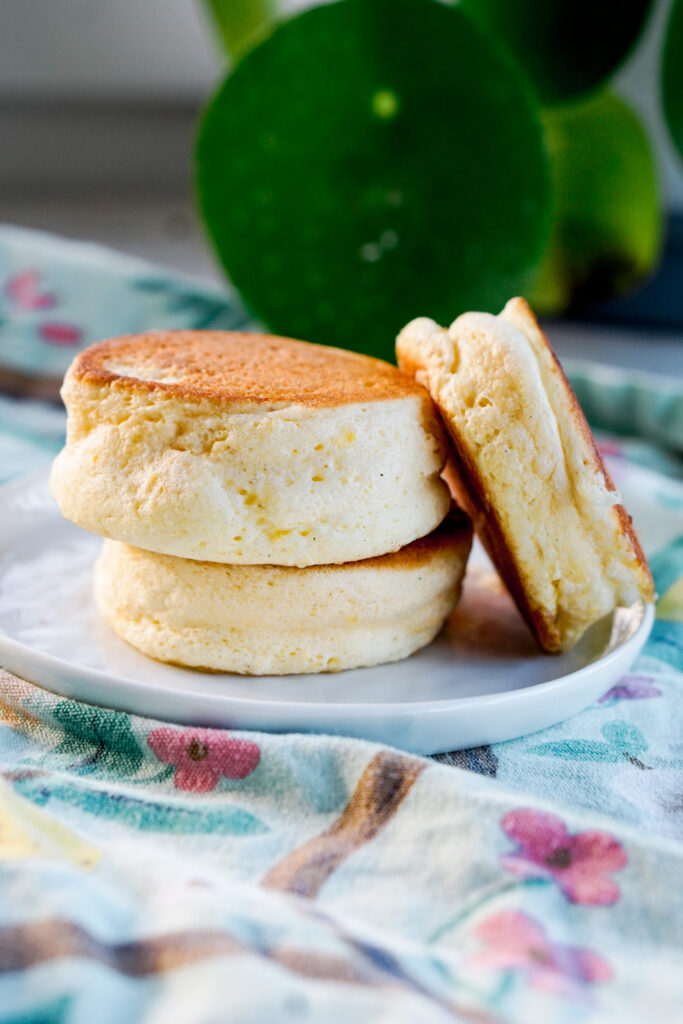
Japanese souffle pancakes are super tall and fluffy pancakes made using whipped egg whites. This recipe uses whole eggs, so you don’t have leftover yolks, and does not require any rings or molds. While making Japanese pancakes seems intimidating, if you follow my step-by-step instructions, even beginners can have success!

What are Japanese Souffle Pancakes?
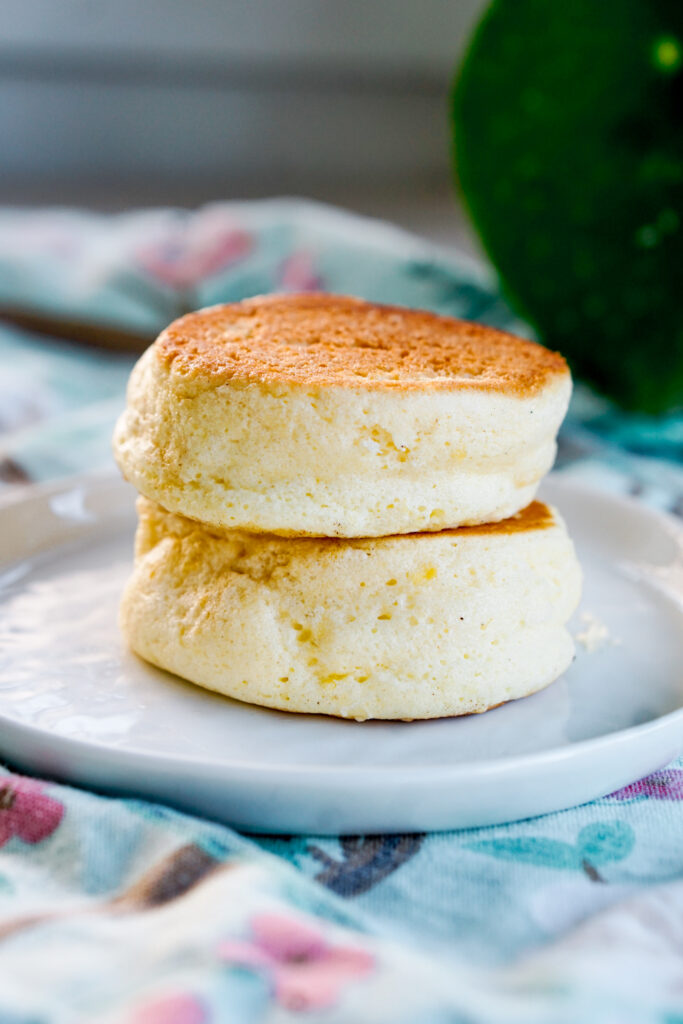
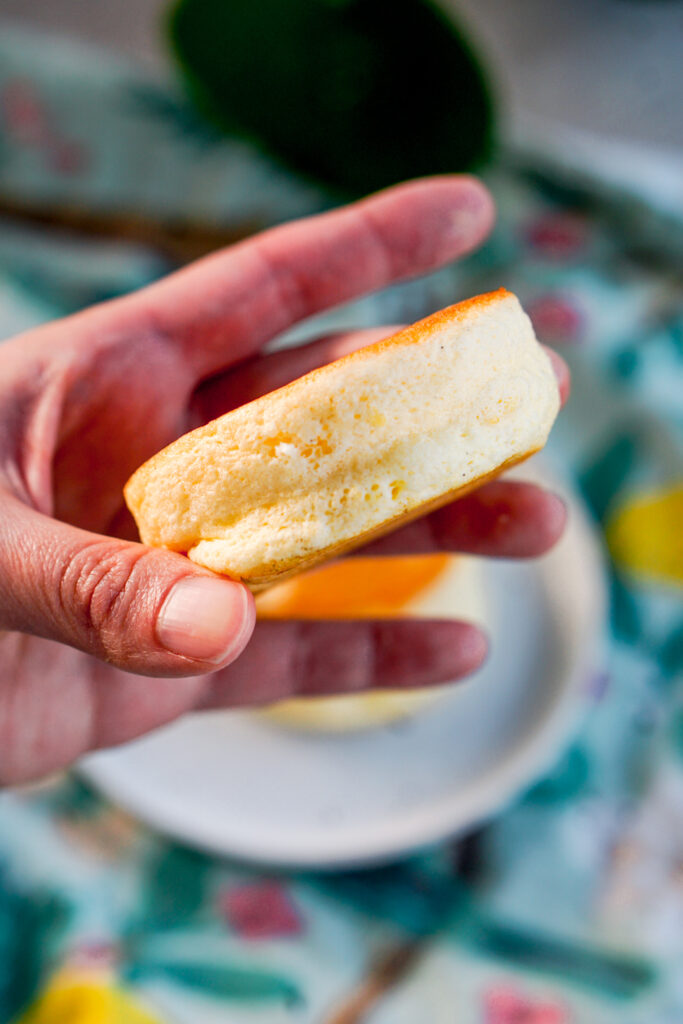
Japanese souffle pancakes differ from typical American pancakes in that they are very tall and have a fluffy and airy texture, almost like a mini sponge cake. They are usually about 3-4 inches in diameter, and at least 1-2 inches in height. They are not a “traditional” Japanese food in that they don’t have a long history in Japan. When I stayed in Kyoto for a summer in college, I don’t think these existed yet! But I’ve noticed they have become super popular on social media in the past 6-7 years, and it doesn’t look like that trend is stopping anytime soon.
You can find souffle pancakes at specialty cafes in Japan, where they are not just served for breakfast. They are so decadent, they can be served as a dessert! You’ll see pancake cafes open all day… like a fancy…artisan… IHOP. What a dream.
How are Japanese Pancakes Made?
Japanese pancakes are made by whipping egg whites into stiff peaks and folding them into the rest of the batter. It’s similar in technique to a souffle (hence the name) or chiffon cake. You then pile tall towers of batter into a griddle or pan and cook for a long time over low heat. In order to get those super tall, fluffy pancakes to cook all the way through, you’ll need either some special tools or techniques. Because this recipe is meant to be for home cooks, I tried not to use any special tools and adjusted the technique to be more user-friendly.
Do I Need a Mold to Make Japanese Pancakes?
Some recipes call for a metal ring in order to cook tall pancakes that would otherwise flop over. While they look amazing, I didn’t feel like buying a tool just for this one recipe, and I’m betting you all probably don’t want to either. So this recipe does NOT use a mold!
What Special Tools Do I Need for Japanese Pancakes?
I’ve read some bloggers who say that you can ONLY use nonstick pans for souffle pancakes. Others say that they could only use an electric griddle. I’ve even read some that say you can’t use a gas stove!
Everyone has different cooking materials and appliances, so I’m not going to recommend one specific tool that will guarantee success.
The important part to know is that you need something that the pancakes will not stick to and something that can cook evenly on low heat for a long time. You’ll also need something with deep sides, as you will be cooking very tall pancakes and need to cover them with a lid.
For me, my Lodge cast iron skillet worked great! It has deep sides, heats very evenly on my gas stove, and is so well seasoned that nothing sticks to it. I used a clear lid that goes with one of my stainless steel skillets when covering it, so that I could keep an eye on the pancakes inside.
The only other tool to think about is what you’ll use to scoop the batter. Some recipes recommend using a piping bag to pipe the batter into a tall mound. Other recipes just use a spoon, ice cream scoop, or cookie scoop. I figured the scooping method would be easier for most people, so I used my 2 tbsp cookie scoop. I love using my cookie scoop because I know every scoop has the same amount of batter, and my pancakes turned out uniform. And, obviously, it is versatile in that you can use it for cookies (or even temari sushi) as well! But if you don’t have a cookie scoop, you can definitely use a regular spoon too.
Tips for Making Japanese Pancakes
Be Familiar With Beating Egg Whites
The number one place where I suspect mistakes can happen in this recipe is with beating egg whites. If you are not familiar with making meringues or beating egg whites to stiff peaks, please go watch a few youtube videos so you know what to look for.
There are a lot of old wives tales about how to get perfect stiff peaks, but I find as long as you have clean kitchen tools, you’ll be fine. I personally like to wait until the egg whites look a little frothy before adding in my sugar, but other home bakers have said that’s unnecessary. When I see the beaters starting to leave ripples in the egg whites that don’t dissolve, sort of like whipped cream, that’s when I start testing for doneness. You can dip a finger in the meringue to see if the sugar has completely dissolved. You can also hold your beater or whisk upside down to see if the meringue holds in a little mountain shape on top instead of flopping down.
Cook Low and Slow
I know, it’s so tempting to turn up the heat. But DON’T. The pancake batter will be piled so high, it will take much longer to cook the insides than a typical pancake. You don’t want to burn the bottom of your pancake while the insides are still raw! If you feel like your pancake has cooked through and the bottom still isn’t brown enough, THEN you can increase the heat slightly. I took about 15 minutes per batch of pancakes in my skillet. Patience pays off!
Add Water to the Pancake Pan and Cover
You’ll notice in the recipe that I call for adding a tablespoon of water to the hot skillet and quickly covering the pan. Do not skip this step! The water that you put into the skillet turns quickly into steam. Steam is hotter than dry air. So adding the steam increases the temperature around the pancake batter. This will help the sides and top of your pancake to cook quicker while the bottom is browning (Side note: This is the same method that bakers use to get a crispier crust when baking bread in the oven). If you try flipping the pancakes before the sides are set, you’ll end up with a giant splat of batter. Make life easier on yourself, and add the water!
More Fluffy Dessert Recipes
Are you addicted to soft and fluffy Asian desserts? Then check out these other recipes!

Japanese Souffle Pancakes
Equipment
- 12 inch skillet with deep sides, either nonstick or cast iron
- lid that can fit 12 inch skillet
- 2 tbsp cookie scoop optional
- electric hand mixer or stand mixer
Ingredients
- 4 eggs separated
- 1/4 cup granulated sugar
- 1/2 cup cake flour can sub ap flour
- 1/2 tsp baking powder
- 1 pinch salt
- 3 tbsp whole milk can sub other milks
- 1/2 tsp vanilla extract
- 4 tbsp water for cooking
- butter for cooking
Instructions
- Whisk the egg yolks, milk, and vanilla in a bowl.
- Add flour, baking powder, and salt. Mix well and set aside.
- With your electric hand mixer or stand mixer with whisk attachment, beat egg whites until frothy. Add sugar and continue to beat egg whites to stiff peaks.
- Set your skillet on low heat and add a small pat of butter, letting it melt while you prepare the batter.
- While skillet is warming up, mix your batter by combining about 1/3 of the stiff egg whites to your egg yolk mixture. Use a rubber spatula to fold it in. When batter is homogenous, add the rest of the egg whites and gently fold to combine, taking care not to overmix.
- By this time, your skillet should be warm enough to begin cooking your pancakes. Use your cookie scoop to place 4-5 scoops spaced out in your skillet (alternatively you could use a piping bag or spoon). Add a second round of scoops on top of your original 4 or 5. Carefully pour 1 tbsp of water into your skillet, avoiding the pancake batter. Quickly cover your skillet with a lid and set a timer for two minutes.
- After two minutes, remove lid and add an additional scoop of batter onto each pancake. Replace lid and continue cooking on low-medium heat for another 5-6 minutes.
- Uncover your skillet. By this time, the bottom of your pancakes should be a golden brown. If they are not, increase your heat and cook for another minute, watching your pancakes carefully so they don't burn. When they are golden brown on the bottom, carefully flip over your pancakes. Sprinkle another tbsp of water into the skillet and cover.
- Cook for another 4 minutes or until the bottom of the pancake is golden brown and the sides have cooked and are dry to the touch. Repeat the cooking process for the remaining batter (may take 1-2 more batches).
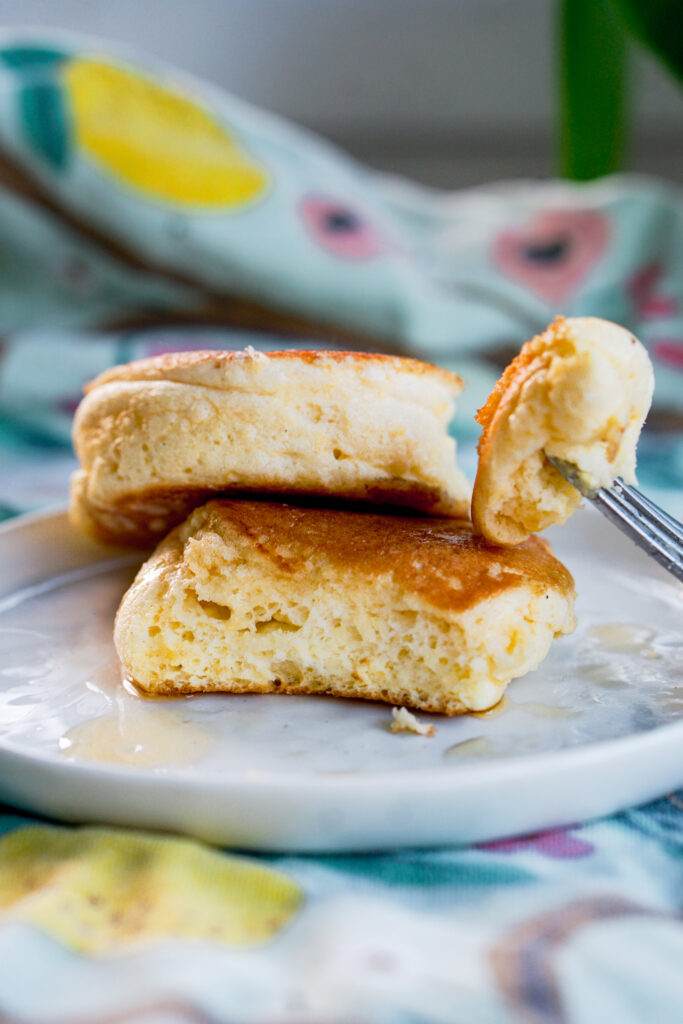
- Serve pancakes immediately with toppings to your liking. Leftovers can be kept in an airtight container at room temperature.