
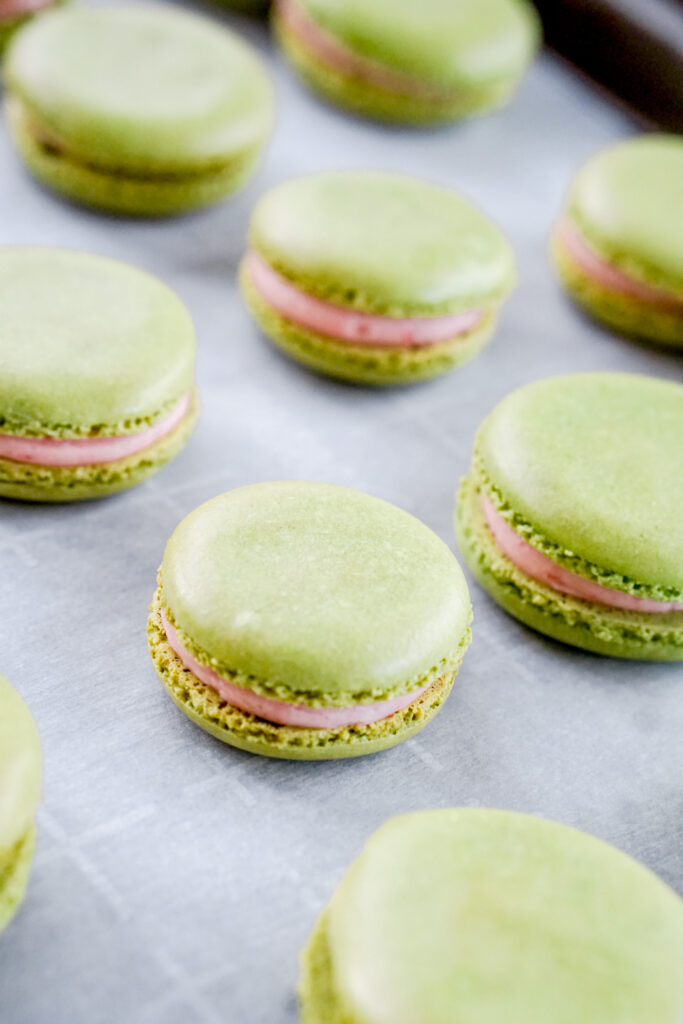
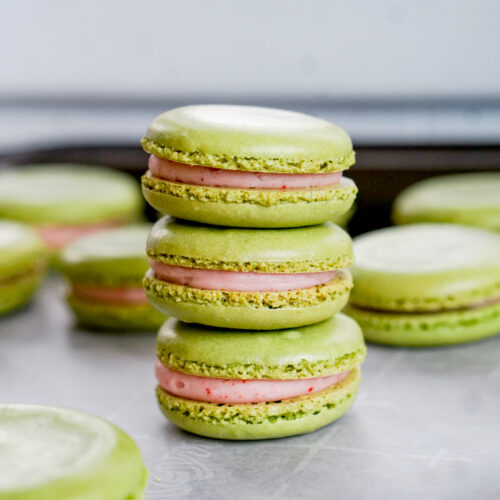
Matcha cookie shells pair perfectly with strawberry buttercream filling for a luxurious strawberry matcha macaron. This recipe uses Italian method macarons best suited for intermediate to advanced bakers.

For those of you who follow along my blog and social media regularly, you probably can tell I’m kind of in a strawberry matcha phase right now. Sorry not sorry? I was actually not intending on creating this strawberry matcha macaron recipe, but I had leftover egg whites from my Christmas cookie baking, and one thing led to another… And well, here we are.
Before we get started, I really need to leave this disclaimer: I am NOT a macaron expert. This post will NOT be a master post on making macarons at home. Macaron making is every bit as difficult and fussy as people say it is. If you’ve never made macarons before, I highly recommend that you start with other blogs or youtube videos geared especially for beginners. This recipe is more for intermediate to advanced bakers. BUT I will leave you with some of my personal tips for how I find success with macarons at home.

French Macarons vs. Italian Method
The first thing to know about making macarons is that there are two methods for making them: French and Italian. In the French method, you beat egg whites and sugar to stiff peaks and fold it into your dry ingredients, almond flour and powdered sugar.
The Italian method is much more complicated. You mix your almond flour, powdered sugar, and half your egg whites into a thick paste. Then you make a boiled sugar syrup (specifically to 244 degrees F), which you have to carefully pour into the rest of your egg whites while they are being beaten. Once you get that to stiff peaks, then you can mix with the almond flour paste to get a macaron batter.
So why did I choose the Italian method over the French method for this recipe? The Italian method results in a more stable batter. I have had MUCH more consistent success with the Italian method over the French method. With the French method, I often got half my shells cracking or otherwise unusable after baking. The shells that appeared well baked often had big hollow spots as well. I have not had either of these problems with the Italian method. So, Italian method it is!

Do I Really Need to Weigh Ingredients for Macarons?
Yes. You do. Just buy a kitchen scale. Amazon has one for only $9. You can use it with other recipes as well, especially any recipes that come from outside the US. It’s worth it.
Do I Really Need Piping Bags and Tips for Macarons?
You absolutely need to use something sturdy to pipe macarons. I have had many a macaron disaster where I squeezed a not-so-great-quality piping bag only to have my batter burst out the seams and all my hard work ruined. That said, I’ve found that Ziploc bags make great piping bags in a pinch. But really, piping bags are not expensive and easily available at any craft store. If you’re worried about using too much plastic, I’ve found that Wilton reusable piping bags work quite well!
I also do recommend getting a Wilton size 12 round tip. If you’re going to go through all the trouble of making something as fussy as macarons, you might as well do it right. Piping without a piping tip will just lead to lumpy, uneven, asymmetrical macarons.

Tips for Beating Egg Whites for Macarons
Part of successful macaron making is beating egg whites properly. Knowing the difference between soft and stiff peaks is crucial for good baking in general. My best advice is to google “egg whites soft peaks” and “egg whites stiff peaks” and look at all the pictures and Youtube videos you can to get a good feel for it. In general, soft peaks is when the egg whites look foamy, white, and the beaters leave tracks. It’ll look kind of like shaving cream. Stiff peaks is when the egg whites are glossy and opaque; they will form a little mountain that holds its shape when you lift the beater and hold it upside down. Here are some more egg white tips for you:
Keep Your Mixing Bowl Clean
Egg whites don’t like to beat into peaks if there’s any sort of oil or fat in your mixture. That means you need to make sure not to get ANY trace of egg yolk in your egg whites. You also need to make sure your bowl and whisk/beaters do not have any trace of oil or fat. I typically don’t have an issue with this as I clean my stainless steel stand mixer bowl in the dishwasher. However, if you feel like your mixing bowl is a little slick on the inside, one way to be sure it’s clean is to wipe them down with vinegar or lemon juice prior to beating. Plastic mixing bowls tend to hold on to oils more (we’ve all felt greasy Tupperware right?); use glass or metal intead.
Beware of Overbeating Egg Whites
It is possible to overbeat your egg whites past stiff peaks. Some bakers safeguard against this by adding a little cream of tartar to their egg whites. However, I have never had a problem of overbeating my egg whites when using the Italian method for macarons. Just make sure you don’t run off and leave the stand mixer running.
Tips for the Macaronage
Most people say the hardest part about making macarons is the macaronage, or the mixing of the batter. Just one stir too many and your entire batch is ruined. Like with the egg whites, my advice is to go watch a ton of Youtube videos of macaron mixing. I’ve always used the “ribbon stage” as a marker for when my macaron batter is done. When I lift the spatula from the batter, it flows off in a sort of ribbon shape. Back in the bowl, it holds its defined edges for a few seconds, but slowly melts back into one homogenous blob of batter. If, after 5-10 seconds, the defined ribbon edges remain visible, your batter is probably undermixed. However, if the ribbon immediately melts back into the batter like a liquid, you’ve overmixed. When you overmix your batter, you have to start the entire recipe over again, so it’s much better to under than overmix.

Piping the Macarons
If you’ve got good fine motor skills, you can skip this step, but for complete beginners, you’ll want to trace 1.5 inch circles onto the backside of your parchment paper as a piping guide. Hold the piping back directly perpendicular to the baking tray at center of the circle, hovering about half an inch above the surface. Holding the bag still, squeeze the bag to pipe out the batter until the circle is filled. I find it helps to count how many seconds of squeezing it takes for the circle to fill. Then, as I continue to pipe each circle, I just squeeze for the same amount of seconds.
After you pipe your macarons, bang the baking trays on the table or counter a few times to pop any trapped air bubbles. Obviously, be careful not to let go of the tray and have macaron batter flying off everywhere.
Drying the Macaron Tops
Before you bake the macarons, you’re supposed to let them sit uncovered to form a little skin on the top of each shell. This skin is what causes the macarons to bake upward instead of outward, forming the “feet” at the bottom edge. With French method macarons, I never had problem with the skin forming… when I baked in southern California. The dry air just sucked the moisture right out of that batter.
When I started baking in Seattle, however… I could wait for literally HOURS and a skin would never form. I was NEVER successful baking French macarons in Seattle.
BUT, once I switched to the Italian method, I never had a problem. 20 minutes was sufficient for my macaron shells to dry out on top, which is about the time it takes my oven to preheat. Perfect!
Bake Low and Slow for Macarons
High heat is a risky venture for macarons. I’ve found the best success baking at 325 degrees F for about 15 minutes. It’s okay if your macaron shells feel overbaked or overly dried out afterwards – the moisture from the filling soaks into the shells and makes them soft again. If my shells are underbaked, I actually have way more issues with the shells falling apart during assembly, not peeling off the baking sheet, or turning too soft once the filling is added.
By the way, are your macarons cracking? I know that macarons cracking COULD be a product of undermixing the batter, BUT in my case, it’s always been an issue of the heat being too high. I noticed that when I baked on thick metal sheets with deeper side edges, the macarons on the sides always cracked. On baking sheets without rims, I never had that problem. I think the extra heat from the sides of the baking tray cracked my macarons! So if you have similar baking sheets, beware!
What Matcha to Use for Macarons?
I’ve said this before in my other matcha posts, but you should really ignore all the labels on matcha. It doesn’t matter if something is labeled “culinary” or “ceremonial.” The most important thing is how it tastes in the end product. With a super sweet cookie like macarons, you’ll want a very strong and bitter matcha, especially because you won’t be adding that much powder to your batter. For this recipe, I used Maeda-en’s Ceremonial Matcha. I can find this at my local Japanese market, but it’s also available on Amazon.

For more detailed information about types of matcha, check out my Ultimate Guide to Matcha post!
Piping the Macaron Filling
It doesn’t matter if you pipe a swirl or blob, as long as you leave a little border around the edge. As you press the macaron shells together, the frosting will flatten outward toward the edges of the shell.

If you’re using a buttercream, like this recipe calls for, make sure to adjust for the temperature of your kitchen! Buttercream is very sensitive to temperature changes. If your kitchen is cold, your frosting will be stiff and hard to pipe. If it’s too hot, it’ll turn to liquid. You can troubleshoot either of these issues by either microwaving small bits of your buttercream for a couple seconds or sticking it in the fridge.
Resting Your Macarons
I highly recommend making your macarons the day before you want to eat them. In order to get sturdy shells, it’s best to bake your macarons until they feel dry and overbaked. When you add the filling, some of that moisture goes back into the shell to make it soft and chewy on the inside, while still crisp on the outside. So make your macarons the day before and let them rest, filled, in an airtight container in the fridge. Just bring them to room temperature prior to eating.
More Matcha Recipes
If you’re interested in (less complicated) matcha desserts, check these out:
- Strawberry Matcha Cookies
- Matcha Black Sesame Cookies
- Matcha Crinkle Cookies
- Matcha Butter Mochi
- Best Matcha Latte

Matcha Macarons with Strawberry Buttercream Filling
Equipment
- Piping Bag
- Round Piping Bag Tip Wilton size 12
- Stand Mixer
Ingredients
Matcha Macarons
- 150 g almond flour super finely ground
- 150 g powdered sugar
- 1 tbsp matcha
- 110 g egg whites from about 4 eggs
- 150 g granulated sugar
- 90 mL water
Strawberry Buttercream
- 4 g freeze dried strawberries about 1/4 cup
- 1/2 cup unsalted butter, softened 1 stick
- 1 cup powdered sugar
- 1 tbsp heavy cream
Instructions
For Matcha Macarons
- Prepare 2-3 baking sheets with parchment paper. Set aside.
- Sift almond flour, powdered sugar, and matcha into a bowl. Whisk until well combined. Add half the egg whites (55g) and stir until a thick paste forms. Cover and set aside.
- Add remaining 55g of egg whites into the bowl of a stand mixer with a whisk attachment and set aside.
- Place 150g of granulated sugar and 90mL of water in a stainless steel saucepan. Attach a candy thermometer and cook on stovetop until mixture reaches 244 degrees F. Turn off the heat and set aside while you immediately prepare the remaining egg whites (Do not pause cooking at this step for any reason!).
- Beat the egg whites from step 3 until soft peaks form.
- CAREFULLY drizzle in the hot sugar solution with the mixer running on low. Increase speed to high and beat until stiff peaks form.
- Take 1/3 of the beaten egg whites and mix into the almond flour paste from step 2 until fully incorporated.
- Fold the remaining 2/3 of the beaten egg whites into your batter using a silicone spatula for your macaronage. When you hold your spatula with the batter dripping off the edge, it should spill down in a slow stream that looks like a ribbon back into the bowl. After a few seconds, the "ribbon" should melt back into a blob. If it holds its defined shape, you need to keep mixing. If it melts immediately back into a liquidy batter, you've overmixed and need to start the entire recipe over.
- Scoop batter into a piping bag fitted with a round tip. Pipe 1.5 inch circles spaced evenly apart on your prepared baking sheets. In a typical 9×13" sheet, I pipe about 4 circles across and 5 rows down, for about 20 macaron shells per sheet.
- Holding the baking sheet in both hands, firmly rap the sheet onto a table or counter to pop any air bubbles in your piped macarons.
- Preheat your oven to 325 degrees F and set piped macarons aside, uncovered, for at least 20 minutes.
- Bake macaron shells in an even layer in your oven for 13-15 minutes, or until the macarons pull easily off the parchment. It's better to overbake than underbake. If you can't fit all your baking sheets in one even layer in your oven, you will have to bake in batches; the remaining unbaked macarons can be left out uncovered while you wait.
- Let baked macaron shells cool completely while you prepare the strawberry filling.
For Strawberry Buttercream
- Pulse freeze dried strawberries in a food process or blender into a fine powder.
- Beat softened butter until creamy, then add powdered sugar and strawberry powder. Beat until well incorporated.
- Add tbsp of heavy cream and beat buttercream until light and fluffy.
For Macaron Assembly
- Scoop buttercream into a separate piping bag fitted with a round tip.
- Divide macaron shells into pairs, matching by size. Pipe buttercream onto one shell of each macaron pair, leaving a few millimeters border between the frosting and the edge of the shell.
- Gently press the matching shell onto the buttercream, squishing the frosting to the edges of the macaron.
- Macarons can be eaten at this point, but taste best after they have been rested in an airtight container in the fridge overnight. Let macarons come to room temperature before eating.
