

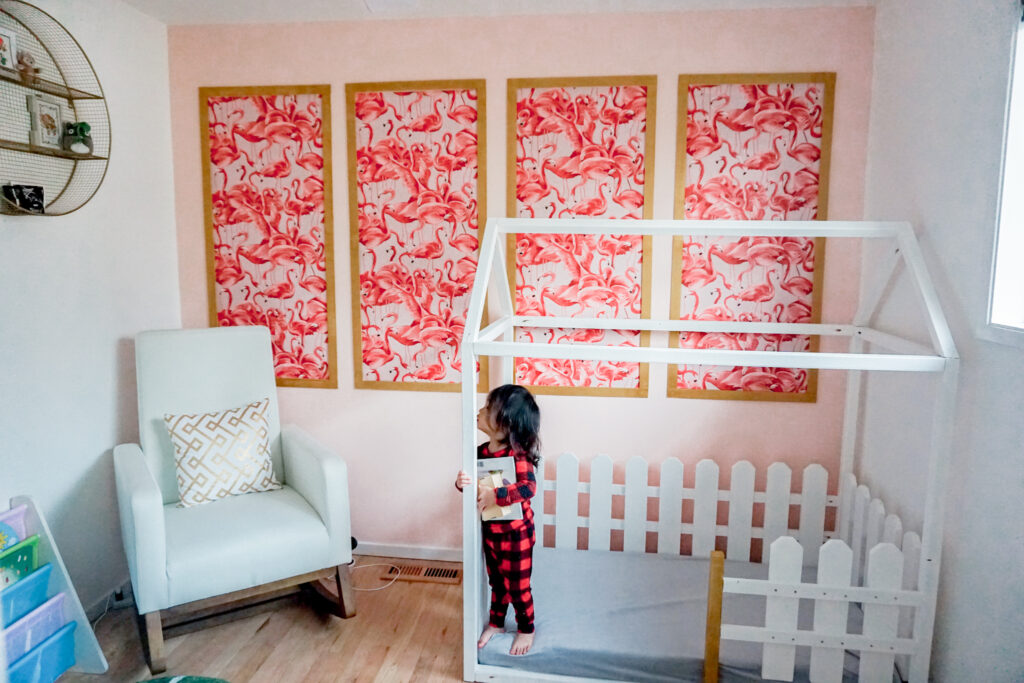
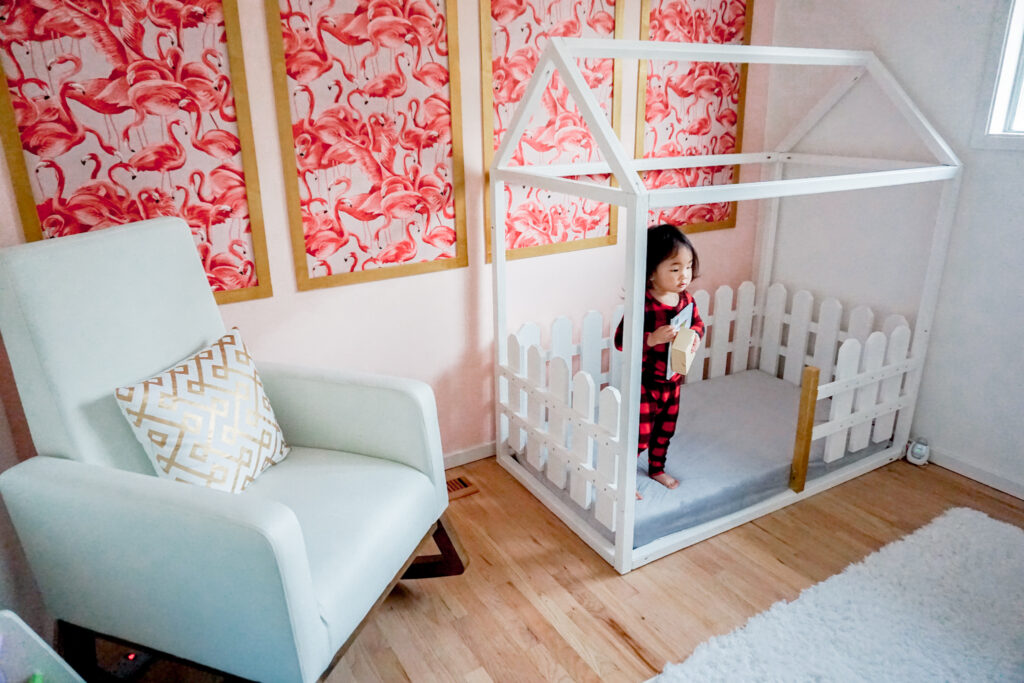
I’m about to show you my favorite room in the house: our flamingo girls’ room with modern chinoiserie wallpaper. I designed this room with our two-year-old daughter in mind. She loves pink and has a bright vibrant personality, so I wanted to reflect that through some fun decor. Plus, a girls’ nursery is the perfect excuse to go wild with an accent wall! The DIY for the faux chinoiserie is easy and affordable. And you can take a peek at the Montessori-style toddler house bed that Jeremy built! Let’s take a look!
*This post contains affiliate links.
How to DIY Modern Chinoiserie
Honestly, I had not heard the term chinoiserie before starting this project. I knew I wanted to do something fun with wallpaper, and originally I thought about doing a large floral mural wall.
But have you SEEN how much those cost?? Good Lord.
So while I was researching wallpaper in kids rooms on Pinterest, I stumbled upon some modern chinoiserie.
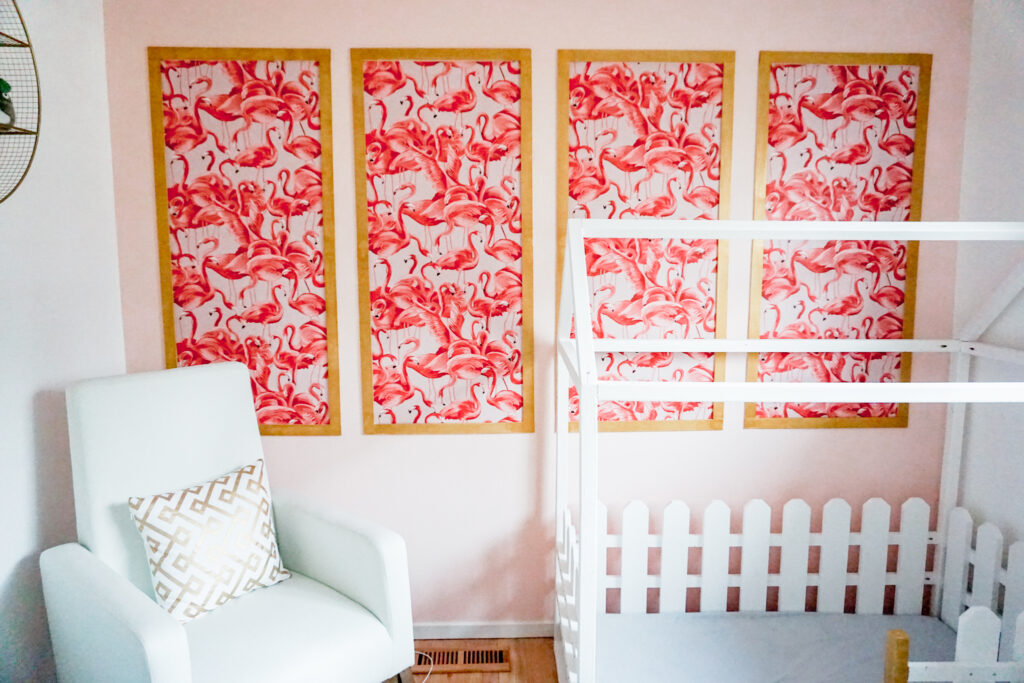
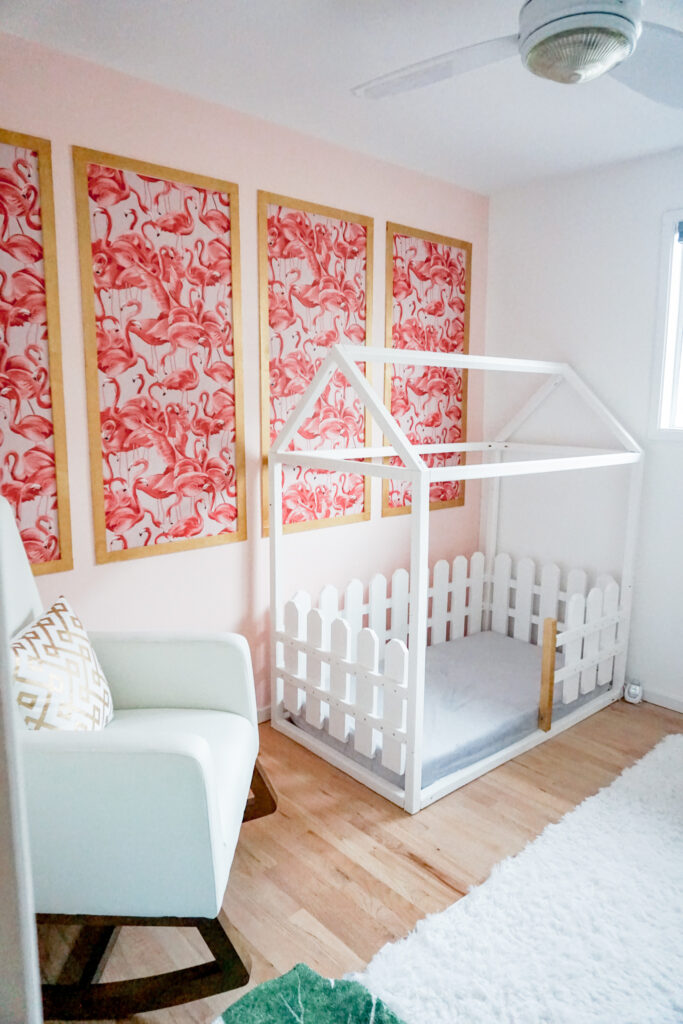
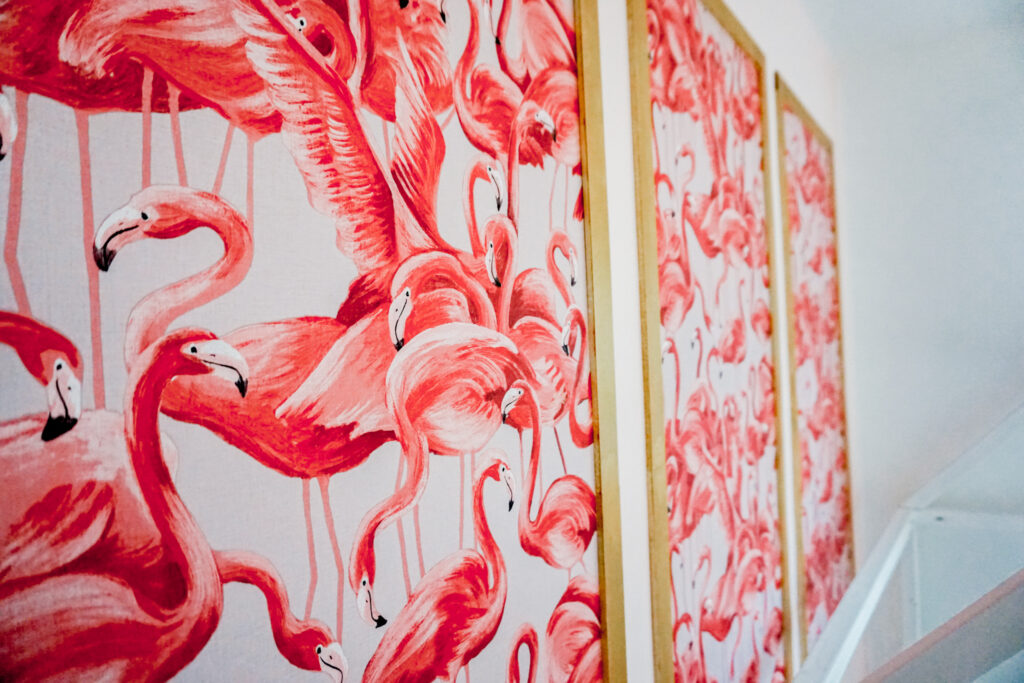
A Flamingo Wallpaper Kids Room
I guess traditionally, chinoiserie is one mural broken into panels. I could’ve still gone with a floral mural, like my original idea, just scaled down to save some money. But this flamingo wallpaper from West Elm caught my eye. It was also very affordable!
I cut one roll of the wallpaper into four panels. Each panel is 4 ft tall and 21 inches wide. You may want to adjust the size of your panels depending on the dimensions of your wall. These are the measurements that looked good for our wall, which is approximately 126″ x 90″.
For the frames we used plain wood trim, 1.5 inches wide, from Home Depot, painted gold.
So total with the wallpaper and frame, each panel is 2 feet by 4 feet 3 inches. We decided to place the bottom edge of the panels 28 inches above the ground with 3 inches in between each panel.
Assembling our Modern Chinoiserie
To back it up a bit, we first painted our wall Benjamin Moore Sunlit Coral. Then, after measuring the spacing between panels, we applied the wallpaper directly to the wall. The wood trim, already painted, went up around the wallpaper to form a frame. My dad helped me put the frame up using a nail gun, but it’s so lightweight, you could easily use command strips or other removable adhesives.


And that’s it! Pretty easy right? And not even that expensive!
Furnishing Our Flamingo Nursery – Kids Reading Nook
So now that we have our wall decorated, it’s time to furnish. I decided to make this little corner a reading nook.

I really enjoy this modern rocking chair. I’ve used it for nursing, and it’s nice to still have some place for an adult to sit in a kid’s room.

The cute little sling bookshelf is from Amazon. I like that it’s fairly easy for little kids to pull books in and out of. The little monstera leaf rug, as well as the white area shag rug, is also an Amazon purchase. I thought they fit in nicely with the flamingo theme.


Up on the wall hangs our gold wire circle shelf from Target! We’ve had this for years. It’s so fun to change out the displays every once in a while.
Bonus: Our DIY Toddler House Bed
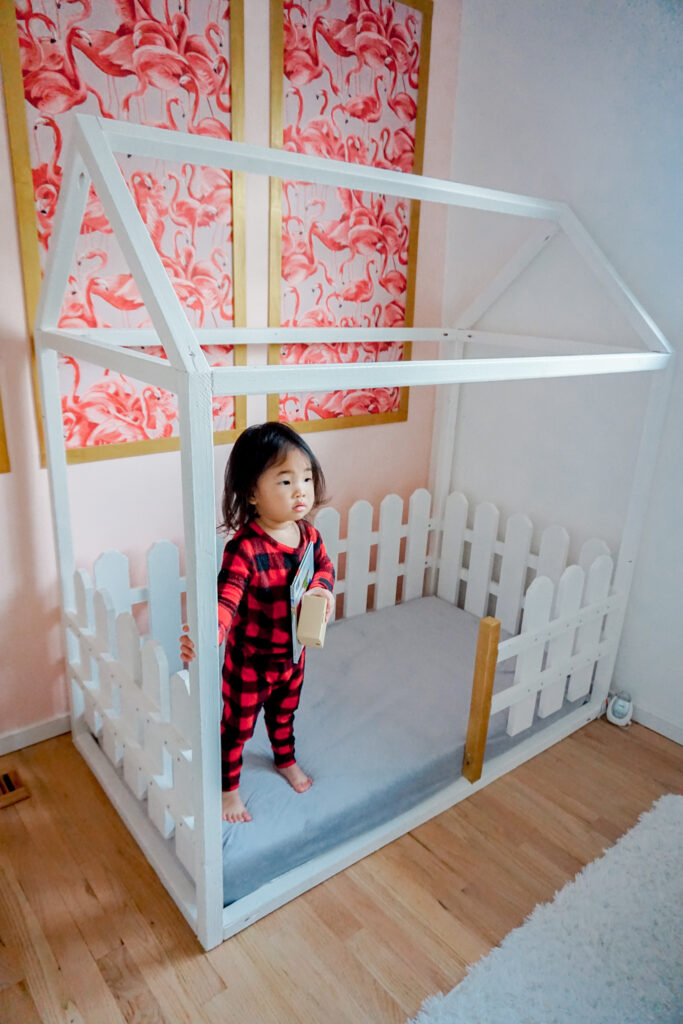
And now for our main piece of furniture: a Montessori-style wood house bed! Jeremy built it himself! It is essentially a wood frame built to fit around a crib mattress that lies on the floor. I am thinking of creating a separate post detailing how he did it…. but in typical Jeremy fashion he did not write down any instructions.

Did I mention he’s an engineer? *face palm*
Oh well, I can at least give the dimensions and tools used. Let me know if you’re interested!
What do you think of our toddler girls’ room? 🙂
